HyperEVM Bridge - How to Bridge to HyperEVM (2026)
Table of Contents
- Why Bridge to HyperEVM?
- Method 1: Transfer from HyperCore to HyperEVM
- Prerequisites
- Step-by-Step Transfer
- Method 2: Bridge Directly to HyperEVM from Other Chains
- Using Across Protocol
- Converting legacy USDH to USDC
- Adding HyperEVM to Your Wallet
- HyperEVM Network Details
- Adding to MetaMask or Rabby
- What You Can Do on HyperEVM
- Lending and Borrowing
- Liquid Staking
- Yield Strategies
- Fees and Timing
- Troubleshooting Common Issues
- Balance Not Showing on HyperEVM
- "Insufficient Gas" Errors on HyperEVM
- Transfer Stuck or Failed
- Next Steps
Info
Quick Summary - Bridging to HyperEVM
- Transfer funds from HyperCore (trading) to HyperEVM (DeFi) via the Portfolio page's "Transfer to/from EVM" feature
- Transfers process in seconds - both layers run on the same Hyperliquid L1, so there is no cross-chain delay
- Gas cost: ~200k gas (~$0.01 in HYPE) per transfer
- Supports USDC, HYPE, HFUN, and other assets - you need a small amount of HYPE for gas on HyperEVM
- Alternative: Bridge directly to HyperEVM from 22+ chains via Across Protocol (skips HyperCore)
- HyperEVM network: Chain ID 999, RPC
https://rpc.hyperliquid.xyz/evm
Why Bridge to HyperEVM?
Hyperliquid is more than a perpetual futures exchange. Its HyperEVM layer turns the platform into a full DeFi ecosystem - complete with lending protocols, liquid staking, yield vaults, and automated strategies. But to access any of it, your funds need to be on HyperEVM specifically, not just on Hyperliquid's trading layer.
When you deposit USDC to Hyperliquid, your funds land on HyperCore - the native trading engine. HyperCore is where perpetual futures, spot markets, and the order book live. HyperEVM is a separate execution environment on the same chain, purpose-built for smart contracts and DeFi applications. To use protocols like ![]() Felix,
Felix, ![]() HyperLend, or
HyperLend, or ![]() Kinetiq, you need funds on HyperEVM.
Kinetiq, you need funds on HyperEVM.
The good news: transferring between HyperCore and HyperEVM takes seconds and costs almost nothing. You can also bridge directly to HyperEVM from external chains using Across Protocol, skipping HyperCore entirely.
New to Hyperliquid? Start with a Fee Discount
Apply our referral code when you first connect. You get a 4% lifetime discount on all trading fees - it cannot be added later.
Open Hyperliquid with 4% DiscountMethod 1: Transfer from HyperCore to HyperEVM
This is the most common method. If you already have funds on Hyperliquid from trading, you can move them to HyperEVM in under a minute.
Prerequisites
Before you start, make sure you have:
- USDC on HyperCore - If you haven't deposited yet, follow our bridge to Hyperliquid guide
- A small amount of HYPE - HyperEVM uses HYPE as its gas token (buy HYPE on Hyperliquid's spot market)
- An EVM wallet -
 MetaMask or
  Rabby both work
Step-by-Step Transfer
Step 1: Open your Portfolio page. Go to app.hyperliquid.xyz and navigate to the Portfolio section. Your HyperCore balances are displayed here.
Step 2: Find the Transfer to/from EVM option. In the Spot transfers section, click Transfer to/from EVM. This opens the internal bridge between HyperCore and HyperEVM.
Step 3: Select HyperCore → HyperEVM. Make sure the transfer direction is set to send funds from HyperCore to HyperEVM. You can reverse the direction later to move funds back.
Step 4: Choose your asset and amount. Select USDC from the dropdown and enter the amount you want to transfer. You can also transfer HYPE (needed for gas), HFUN tokens, or other supported assets.
Tip
Step 5: Confirm the transfer. Click Transfer and confirm in your wallet. The transaction processes on-chain within seconds. There is no bridging delay because both HyperCore and HyperEVM run on the same Hyperliquid L1 - it is an internal ledger transfer, not a cross-chain bridge.
Step 6: Verify your balance. Your HyperEVM balance should appear almost instantly. You can check it on the Portfolio page under the EVM tab, or by adding the HyperEVM network to your wallet.
| Detail | Value |
|---|---|
| Transfer direction | HyperCore → HyperEVM |
| Supported assets | USDC, HYPE, HFUN, and others |
| Transfer fee | Minimal gas (~200k gas at base price) |
| Processing time | Seconds |
| Gas token on HyperEVM | HYPE |
Method 2: Bridge Directly to HyperEVM from Other Chains
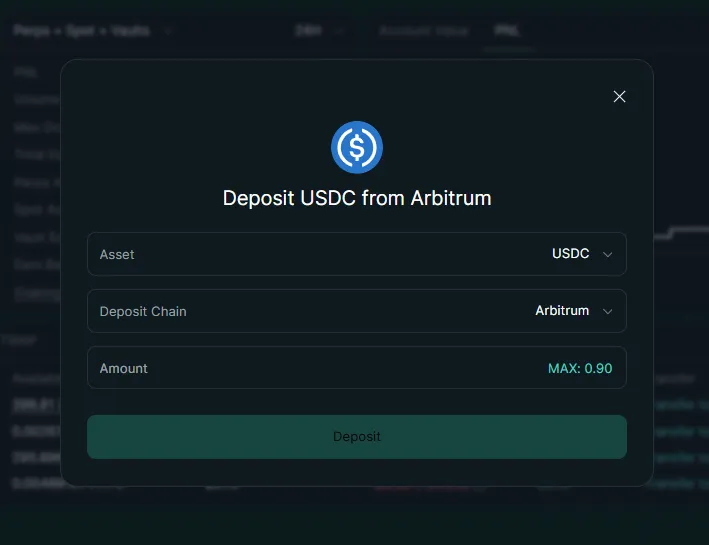
If your funds are on Ethereum, Base, Arbitrum, Solana, or another chain, you can skip HyperCore entirely and bridge directly to HyperEVM using Across Protocol.
Using Across Protocol
- Go to app.across.to
- Connect your wallet
- Select your source chain (Ethereum, Base, Optimism, Arbitrum, BNB Chain, Solana, etc.)
- Select USDC as the token to bridge
- Choose HyperEVM as the destination - not HyperCore
- Enter the amount and review fees (most transfers under $1,000 cost less than $1)
- Confirm the transaction in your wallet
- Receive USDC on HyperEVM within seconds
Info
This method is particularly useful if you are coming from another DeFi ecosystem and want to deploy capital directly into HyperEVM protocols like ![]() Felix or
Felix or ![]() HyperLend without needing to interact with Hyperliquid's trading interface at all.
HyperLend without needing to interact with Hyperliquid's trading interface at all.
Converting legacy USDH to USDC
If you still hold USDH - Hyperliquid's original native stablecoin, now sunset under AQAv2 - you can swap it to USDC on HyperEVM. On Across Protocol, USDH→USDC conversions are free (1:1 ratio). All USDH-denominated markets on HyperCore have settled, so USDC is now the asset to hold. For background, see our USDH stablecoin guide.
Adding HyperEVM to Your Wallet
To see your HyperEVM balance and interact with DeFi protocols, you need to add HyperEVM as a custom network in your wallet.
HyperEVM Network Details
| Setting | Value |
|---|---|
| Network name | HyperEVM |
| RPC URL | https://rpc.hyperliquid.xyz/evm |
| Chain ID | 999 |
| Currency symbol | HYPE |
| Block explorer | https://explorer.hyperliquid.xyz |
Adding to MetaMask or Rabby
In ![]() MetaMask, go to Settings → Networks → Add Network → Add a network manually and enter the details above. In
MetaMask, go to Settings → Networks → Add Network → Add a network manually and enter the details above. In ![]() Rabby, the network may already be available in the chain selector - search for "HyperEVM" or "Hyperliquid." If not, add it manually using the same RPC details.
Rabby, the network may already be available in the chain selector - search for "HyperEVM" or "Hyperliquid." If not, add it manually using the same RPC details.
Once added, switch your wallet to the HyperEVM network to view your balances and interact with DeFi protocols.
Warning
What You Can Do on HyperEVM
Once your funds are on HyperEVM, you have access to a rapidly growing DeFi ecosystem. Here are the major protocols:
Lending and Borrowing
 Felix Protocol - Borrow USDH stablecoins against your HYPE as collateral. Felix uses a CDP (collateralized debt position) model similar to Liquity, with one-time borrowing fees instead of ongoing interest rates.
 HyperLend - A lending market where you can supply USDC, HYPE, or other assets to earn interest, or borrow against your deposits. Variable rates based on supply and demand.
Liquid Staking
 Kinetiq - Stake HYPE and receive stHYPE, a liquid staking token that earns staking yield while remaining usable as collateral across HyperEVM DeFi protocols.
Yield Strategies
- Delta-neutral vaults that capture funding rate yield from perpetual futures
- Automated trading vaults running quantitative strategies
- Liquidity provision on HyperEVM AMMs
For a comprehensive breakdown of yield opportunities, see our HyperEVM yield strategies guide. For the full ecosystem overview, read our Hyperliquid DeFi ecosystem guide, or browse every protocol by category in the HyperEVM ecosystem map.
Start Earning on Felix Protocol
Borrow USDH against your HYPE - one-time fee, no ongoing interest.
Open Felix ProtocolFees and Timing
Bridging to HyperEVM is one of the cheapest DeFi operations you will find. Here is a complete cost breakdown:
| Operation | Cost | Time |
|---|---|---|
| HyperCore → HyperEVM transfer | ~$0.01 in HYPE gas | Seconds |
| HyperEVM → HyperCore transfer | ~$0.01 in HYPE gas | Seconds |
| Across Protocol → HyperEVM | Free to $1 (varies by route) | 2-10 seconds |
| Arbitrum → HyperCore (native bridge) | ~$0.10-0.50 in ETH gas | 1-2 minutes |
| HyperEVM DeFi transactions | Fractions of a cent in HYPE | Sub-second |
The internal HyperCore-to-HyperEVM transfer is essentially free. Gas costs on HyperEVM itself are negligible - far cheaper than Ethereum mainnet and comparable to the cheapest L2s.
Troubleshooting Common Issues
Balance Not Showing on HyperEVM
If you transferred funds but they are not visible:
- Check your wallet network. Make sure your wallet is switched to the HyperEVM network (Chain ID 999), not Arbitrum or Ethereum.
- Add the USDC token manually. Your wallet may not auto-detect USDC on HyperEVM. Import the token using the USDC contract address on HyperEVM (check the Hyperliquid docs or block explorer for the current address).
- Verify on the Portfolio page. The Hyperliquid portfolio page shows both HyperCore and HyperEVM balances - check the EVM tab to confirm your transfer went through.
- Wait a moment and refresh. While transfers are near-instant, wallet RPC calls sometimes lag by a few seconds.
"Insufficient Gas" Errors on HyperEVM
If you get gas errors when trying to interact with a DeFi protocol:
- You need HYPE on HyperEVM to pay gas - USDC alone is not enough.
- Transfer at least 0.5 HYPE from HyperCore to HyperEVM using the same Transfer to/from EVM process.
- If you do not have HYPE, buy a small amount on Hyperliquid's spot market first, then transfer it.
Transfer Stuck or Failed
Internal transfers between HyperCore and HyperEVM almost never fail. If one appears stuck:
- Refresh the Hyperliquid page and check both your HyperCore and HyperEVM balances.
- If funds left HyperCore but have not appeared on HyperEVM, wait 30 seconds and refresh again.
- If the issue persists, disconnect and reconnect your wallet.
- For bridge-related issues (Across Protocol), check the transaction status on the Across app using your transaction hash.
For more help with deposit issues, see our deposit not showing troubleshooting guide.
Tip
Next Steps
With funds on HyperEVM, you are ready to explore Hyperliquid's DeFi ecosystem:
- HyperEVM explained - Deep dive into HyperEVM's architecture and how it works alongside HyperCore
- Felix Protocol guide - Borrow USDH against HYPE with one-time fees
- HyperLend guide - Lend and borrow assets on Hyperliquid
- Liquid staking guide - Stake HYPE for stHYPE and earn yield
- HyperEVM yield strategies - Delta-neutral vaults, funding rate arbitrage, and automated strategies
- Hyperliquid DeFi ecosystem - Full overview of every protocol on HyperEVM
- Hyperliquid vaults guide - HLP and community vaults for passive trading income
- USDH stablecoin guide - Hyperliquid's native stablecoin and fiat on-ramp
Ready to Explore DeFi on Hyperliquid?
Start with a 4% fee discount on all trades. Bridge funds, earn yield, and access the full Hyperliquid ecosystem.
Open Hyperliquid with 4% DiscountFrequently Asked Questions
The standard method is a two-step process. First, deposit USDC to Hyperliquid's HyperCore layer via the native Arbitrum bridge or a third-party bridge like Across Protocol. Then transfer funds from HyperCore to HyperEVM using the built-in Transfer to/from EVM feature on your Portfolio page. Alternatively, you can bridge directly to HyperEVM from other chains using Across Protocol by selecting HyperEVM as the destination.
HyperCore is the native trading layer where perpetual futures, spot trading, and the order book operate - it has zero gas fees for trading. HyperEVM is the Ethereum-compatible smart contract layer where DeFi protocols like Felix, HyperLend, and Kinetiq run. Both layers exist on the same Hyperliquid L1 blockchain and share state, but you need to transfer funds between them explicitly.
Yes. HYPE is the gas token for HyperEVM, similar to how ETH is used for gas on Ethereum. You need a small amount of HYPE in your HyperEVM wallet to pay for smart contract transactions. Transfer HYPE from HyperCore to HyperEVM using the same Transfer to/from EVM feature. Gas costs on HyperEVM are very low - a fraction of a cent per transaction.
Yes. Across Protocol supports bridging directly to HyperEVM from 22+ chains. On app.across.to, select your source chain and choose HyperEVM (not HyperCore) as the destination. This skips the intermediate step of depositing to HyperCore first. The transfer typically completes in seconds and costs under $1 in fees.
Transfers between HyperCore and HyperEVM process on-chain within seconds. Since both layers run on the same Hyperliquid L1 blockchain, there is no bridging delay. You just need to confirm one transaction and pay a small gas fee in HYPE.
Disclaimer: This content is for informational purposes only and does not constitute financial advice. Trading perpetual futures involves substantial risk of loss. Past performance is not indicative of future results. Always do your own research before trading. This site contains referral links - see our disclosure for details.
Ready to Start Trading?
Join Hyperliquid with our referral link and get a 4% lifetime fee discount. No KYC, no email - just connect your wallet and trade.
Start Trading - Save 4%